Showing posts with label sewing. Show all posts

Friday, December 2, 2011

it's beginning to look a lot like christmas


It's the most wonderful time of the year! Using this tutorial, I made us a little family set of stockings =) I love them. Mine is the blue one, david's the white and red one, and our little boy's is the grey houndstooth. They literally took me not more than an hour and I got the fabric at Joann's on black friday, mega discount! Pretty, quick, and cheap makes a pretty happy girl. Plus they replace my awful red velvety ones I got at the dollar store. If only I had a mantle to hang them on....

Using this tutorial, I made a wreath which I have yet to take a picture of. I will though. I love my wreath, plus it only cost me 5 bucks total. =) And here's our puny tree. I ran out of lights at the top.

Tuesday, July 26, 2011

gramps camp

My parents are such hip grandparents. I'm so excited for our future children to get to know my sweet mom and dad. A few years ago they started a thing called "gramps camp" where the grandkids who are over the age of 5 (or out of diapers) get to come to the grandpappy's house for a few days to play with cousins and do cool stuff. This year their theme is "Adventures under the sea." I sort of volunteered to make their t-shirts which was a task since there were 10 to make. I decided to use the freezer paper method which is simple and yields good results. I forgot to take a picture of the front...but I got pictures of the back and all the kids names: girls' names in the shape of a dolphin, boys in the shape of a shark.All you do is use an exacto knife to cut out the parts you want to be painted on the shirt and then put the SHINY side down to the shirt. That's the part that sticks to the shirt when you iron over it.
I added some bubbles

Yay for gramps camp! Wish I could be there to play with all of the little ones. Hope the sharks and dolphins play nice with each other =)


Friday, July 15, 2011

feelin' crafty


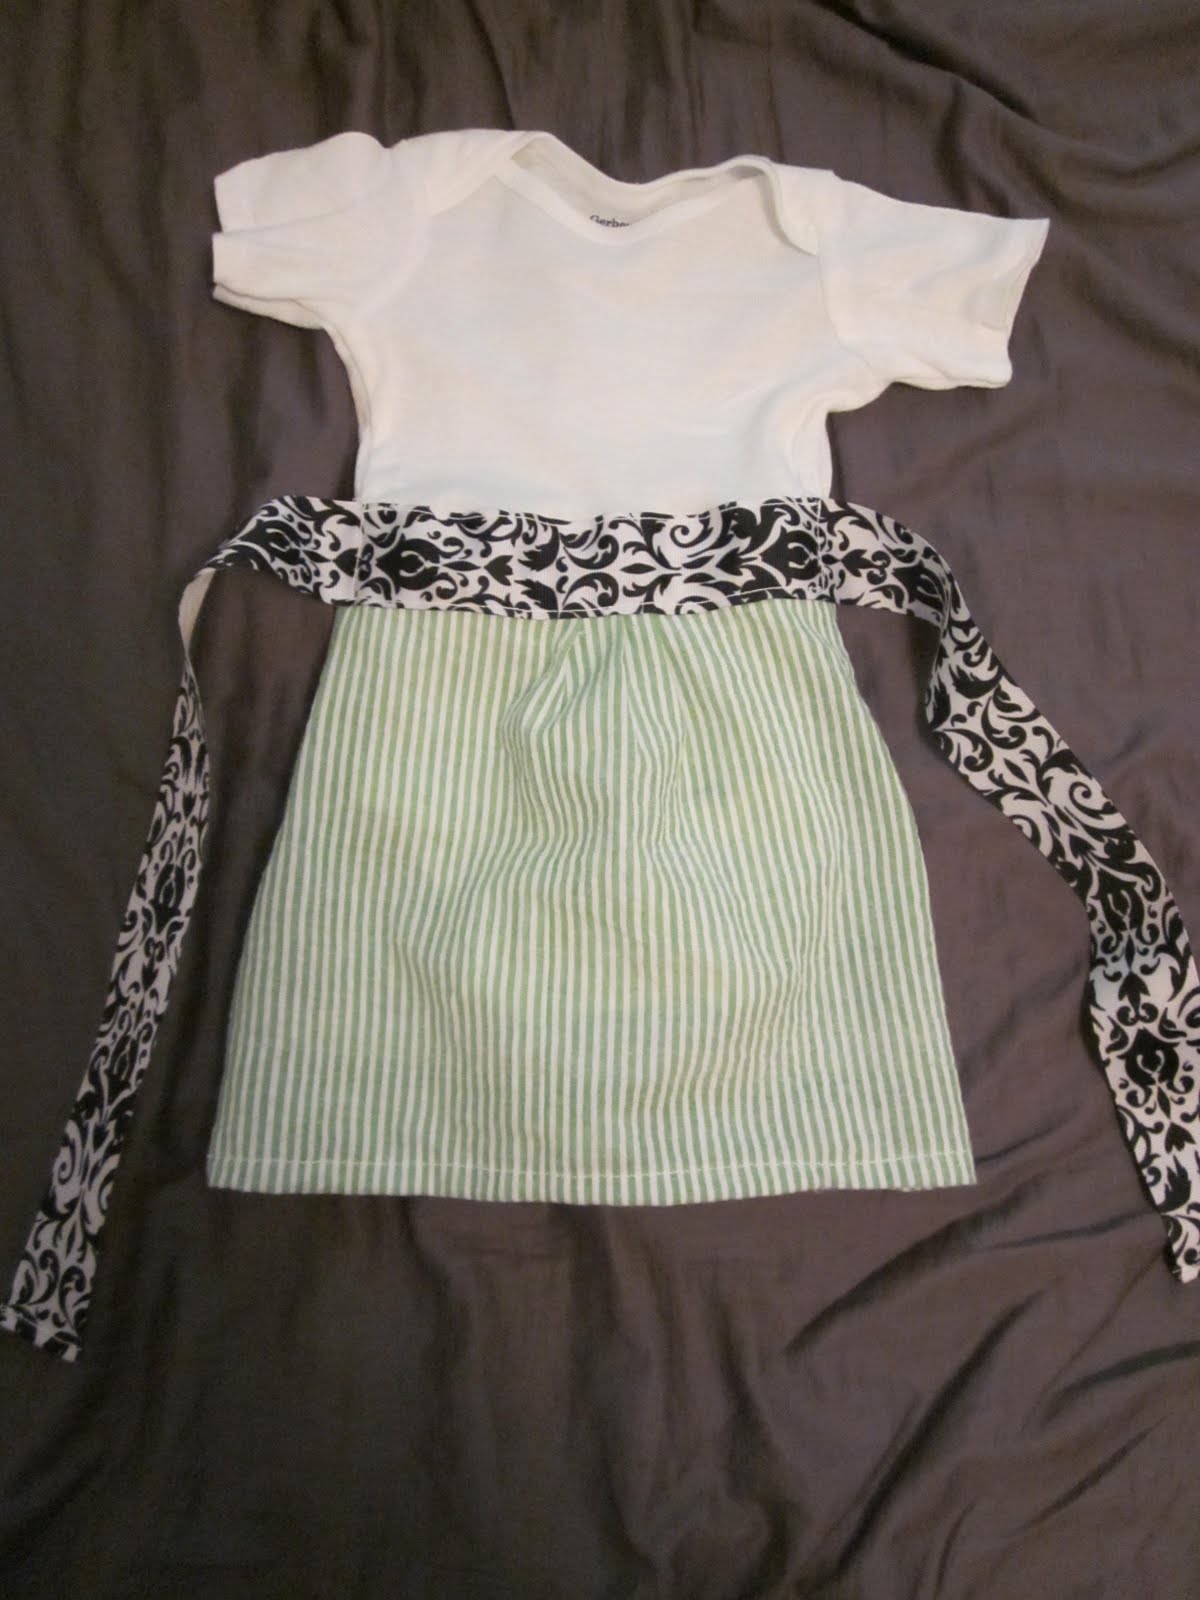
My friend Ciara is having a little girl and her shower is on Saturday. I've been dying to try my hand at some actual baby "clothes" so this was the perfect opportunity. I admit I am no Martha Stewart and my sewing is not perfect, but the website Make it and love it has been very helpful. She puts things simply and you don't have to be an expert to do what she does. Lots of tutorials on everything.

I've made a little dress and some flowers so far. Next I'm gonna make a bib. These tutorials proved useful:


I kind of made my own version of these things so they're how I like them. Here they are voila!

Here is the dress I made from a onsie (no I did not make the shoes, they are just so perfect though!)
I basically made a little skirt to sew onto the onsie. I put a couple of pleats in the front for fun and sewed on some extra ribbon we used in my wedding.


Ahh these shoes kill me! I found them at Target, last ones on the shelf. They're sized for newborns and yes I know newborns can't walk, but so what? They can look stylish too for all the thousands of photos first time parents will take of them.

I also made a bunch of little felt button bows. Simple really. I am not a tutorial master but this is what I did:

Need: hot glue/gun
felt
scissors
buttons
scrap fabric

First I measured and cut out 5 circles the same size: 4 for the petals, 1 for the based. I used my husband's acid reflex bottle to trace.
Once I had them all cut, I cut 2 slits in one for the base. The hair clip will slide through there later.

I picked some of my scrap fabric to cover a button with. Can you tell I love green and yellow?
Then I put some hot glue on the top of the button to attach a little square of fabric. Then on the back I gradually added hot glue and spun it around to make the fabric lay flat on the front of the button.

Then one by one I folded each of the 4 circle petals in half, then again so it was in 4ths.


I put a dab of hot glue between the folded 4ths and held it til it dried. Then it looks like a fortune cookie. Once each of the 4 circles looked like fortune cookies, I glued them down to the base so it looked like a fluffy pie. I slid the hair clip through the back slit, cut earlier, and put hot glue under the ends to keep it in place.
Then I glued the button down in the middle of the petals. When you press it down it make the petals stick up on the edges.
So I made several of these. I found you can easily clip these onto clothes too. Ahh making baby stuff is so much fun.


Sunday, May 15, 2011

A is for Apron

I have really wanted an apron lately. It seems adorable aprons are for sale everywhere that could easily be dresses they're so cute. Like these from Anthropologie I saw hanging in the store:


But rather buy one...I made one. I looked for a while for a good free pattern off the internet...but alas I did not find one that was exactly what I wanted. So basically I just made mine up. A long time ago when I was like 15 or so I made one so that gave me a sprinkle of confidence. Plus an apron isn't meant for public viewing exactly, so I wasn't too worried about its perfectness (and perfect it is not, but thats OK). So I just kind of made it up as I went. I love my new apron and I find any excuse to use it.

I started with these 3 fabrics, I love love the green stripes.
I wanted the ends to have that ribbon shape, but MAN those are hard. Anyone know an easy way to do that?
I wanted to use lots of the lemon fabric, but by the end I just liked the stripes and didn't want to ruin it. I did however add a little lemon detail.
I gave it some pockets too
Ta da!

If anyone knows of some great place to find cute patterns too, I'd love to know! I think my next sewing project will have to be some sort of skirt. Summer is coming and I have to be prepared =)


Friday, May 6, 2011

Diaper bag magic

My beautiful sister Erin had a baby boy in March so I wanted to try my hand at making a diaper bag (made the bag in march...she has it already). This was a FIRST. In the past I've made quilts, hemmed shirts, made skirts, shirts, and other random things, but they were all flat. I had never made anything that was supposed to have shape. So to try my first bag...I figured my sweet sister wouldn't mind the imperfections that were sure to come, and they did. I got this free diaper bag pattern and picked out fabric. Her little boy's room is cowboy themed; so browns, rust, and blues, were the colors of choice. I struggled little through this process because: WARNING the steps are not all explained EXACTLY. There are a couple things missing from this tutorial. So if you decide to do it, take it slow. I wish I could remember now what I messed up and had to do over so I could tell you...but I can't. Maybe if I make another some day those fixed mistakes will come to the surface again. But for now...this is what I did! YAY!